Grounds of Freedom is a series of web videos exploring the meaning and value of freedom. It is animated in 2D with Adobe Character Animator with puppets based on photographs of mini-figures. Grounds of Freedom is a coffee shop, where a variety of animated mini-figures gather to discuss freedom, and its application to present day cultural issues and events. It is created with a workflow that weaves through a variety of Creative Cloud apps, by people collaborating from all over the US. I recently made a presentation about the workflow we used at Adobe MAX in LA, and wanted to share that information with our viewers as well.
 We initially looked at communicating our message through a live action series, but I was inspired by the preview releases of Adobe Character Animator (Abbreviated “Ch”) to pursue a new digital approach to brick-filming, which is traditionally accomplished through stop motion animation. Animation gives us more control and flexibility over the message and dialog, lowers production costs, and eases collaboration over long distances, as there is no “source footage” to share.
 Creating the Characters
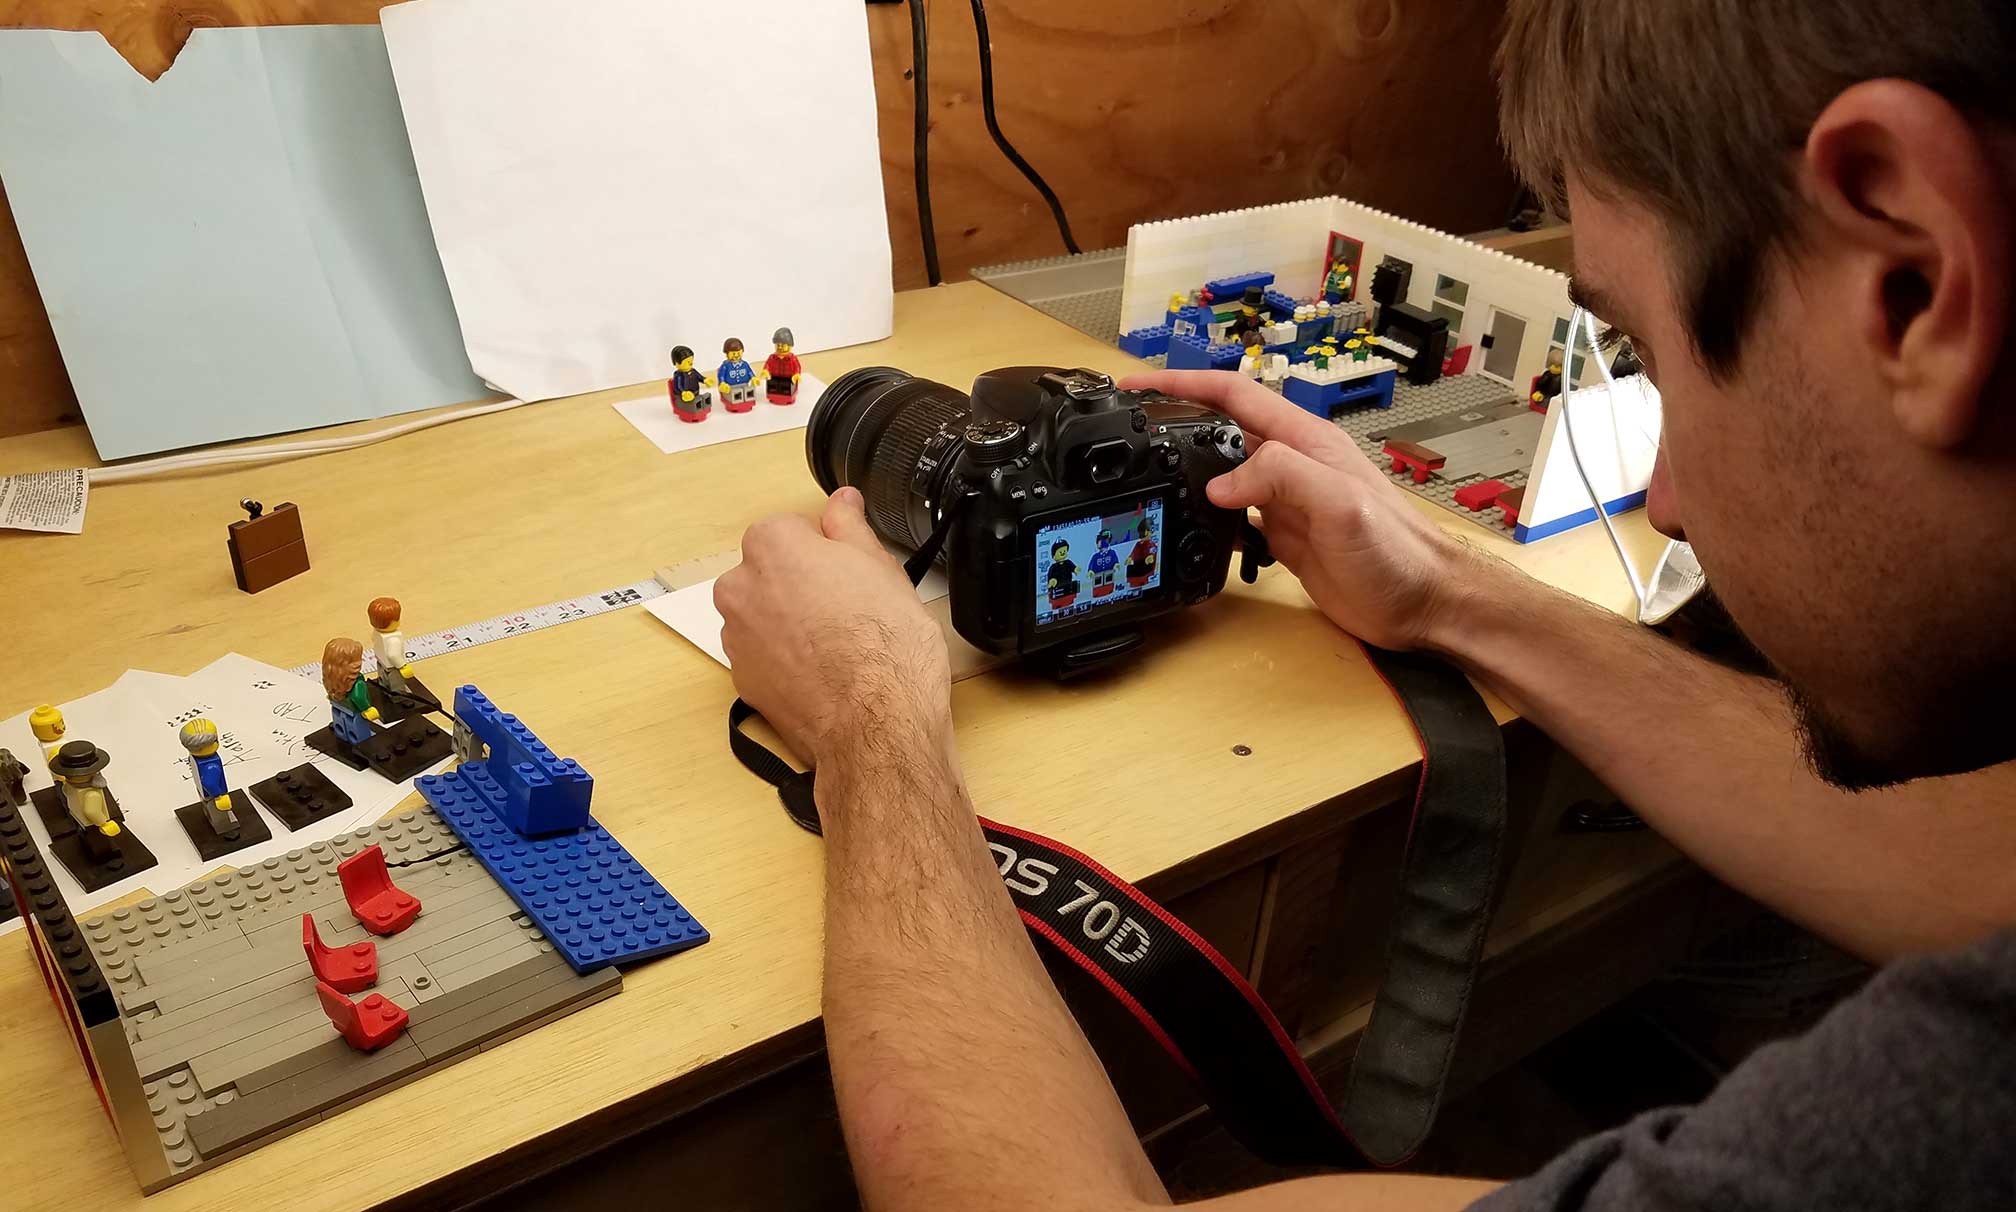
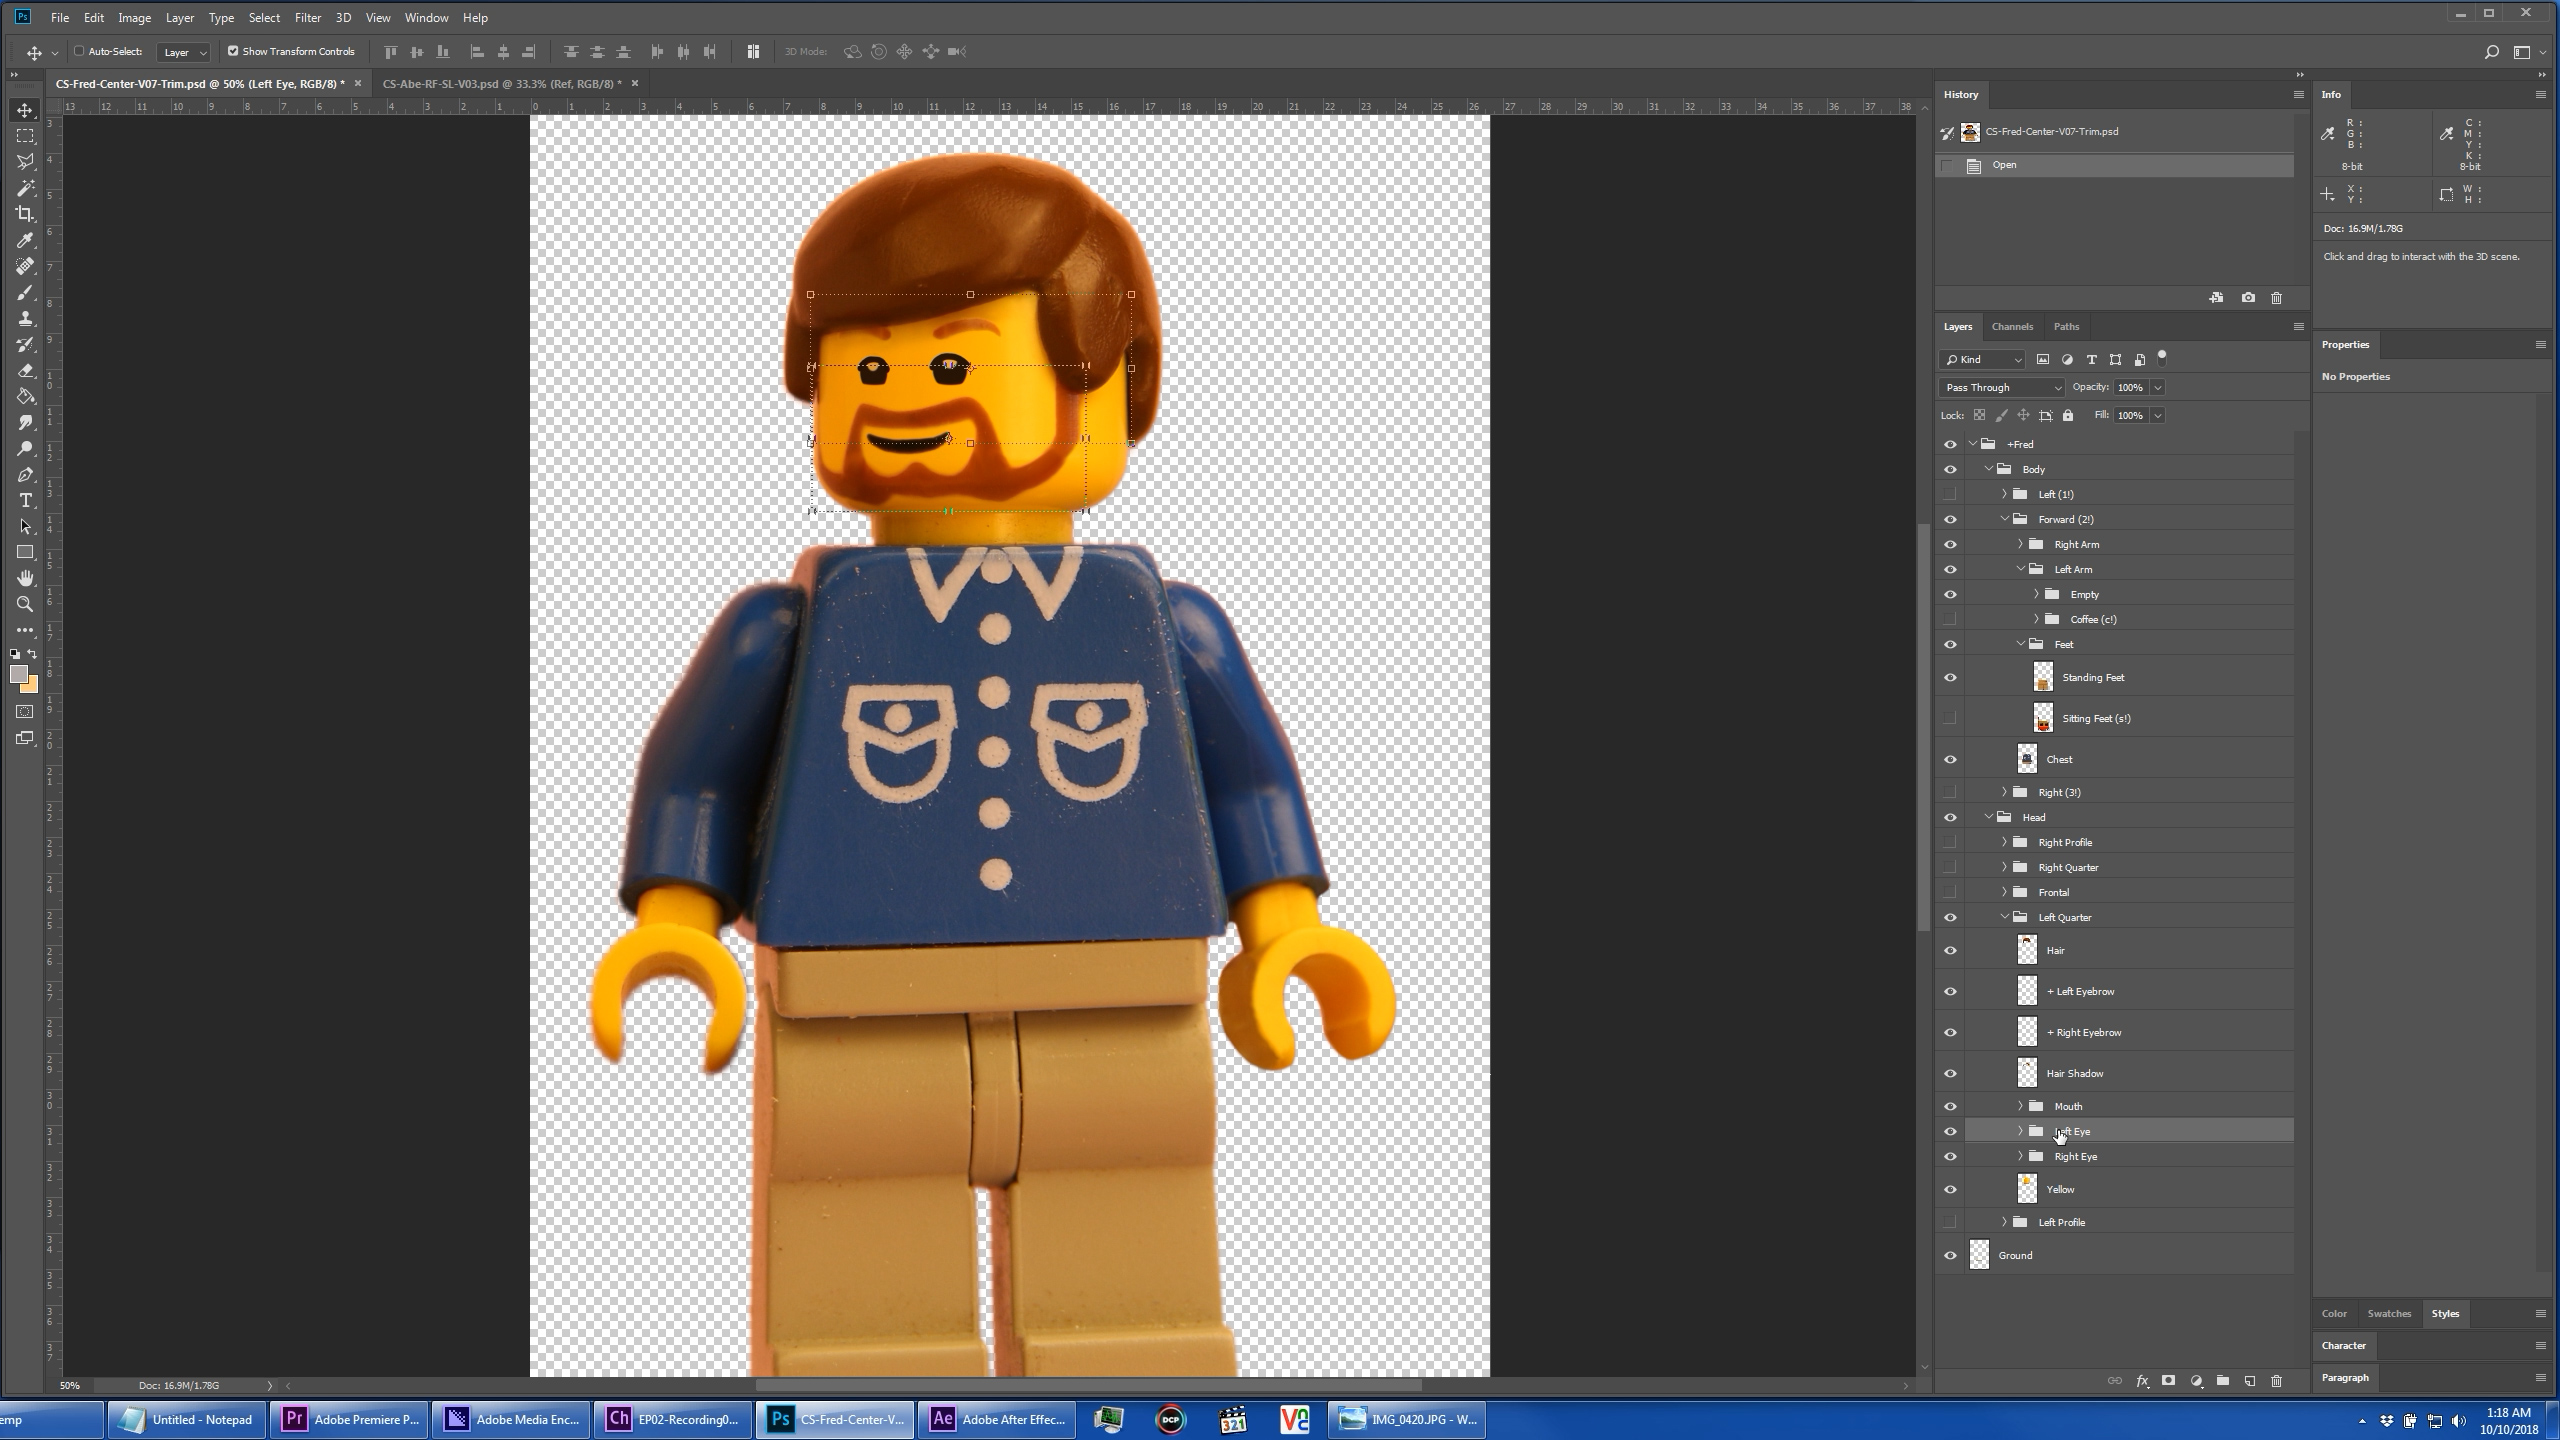
The biggest challenge to using Character Animator, is the creation of the digital puppets, which are deeply layered Photoshop PSDs, with very precise layer naming and stacking. There are ways to generate the underlying source imagery in 3D animation programs, but I wanted the realism and authenticity of sourcing from actual photographs of the models and figures. So we took lots of 5K macro shots of our sets and characters in various positions with our DSLRs, and cut out hundreds of layers of content in Photoshop, to create our characters and all of their various possible body positions. The only thing that was synthetically generated were the various facial expressions digitally painted onto their clean yellow heads, usually to match an existing physical reference character face.
 Once we had our source imagery organized into huge PSDs, we rigged those puppets in Character Animator with various triggers, behaviors, and controls. The walking was accomplished by cycling through various layers, instead of the default bending of the leg elements, and arm movement was created by mapping each arm position to a MIDI key. Facial expressions and head movement are controlled via the webcam, and the mouth positions are calculated by the program based on the accompanying audio dialog.
 Animating our Digital Puppets
The puppets had to be finished and fully functional before we could start animating on the digital stages we had created. But we had been writing the scripts during that time, parallel to generating the puppet art, so we were ready to record the dialog by the time the puppets were finished. We initially attempted to record live in Character Animator, while capturing the animation motions as well, but we didn’t have the level of audio editing functionality we needed available to us in Character Animator. So during that first session, we switched over to Adobe Audition, and planned to animate as a separate process, once the audio was edited. That whole idea of live capturing audio and facial animation data is laughable now, looking back, since we usually spend a week editing the dialog before we do any animating. We edited each character audio on a separate track, and exported those separate tracks to Character Animator. 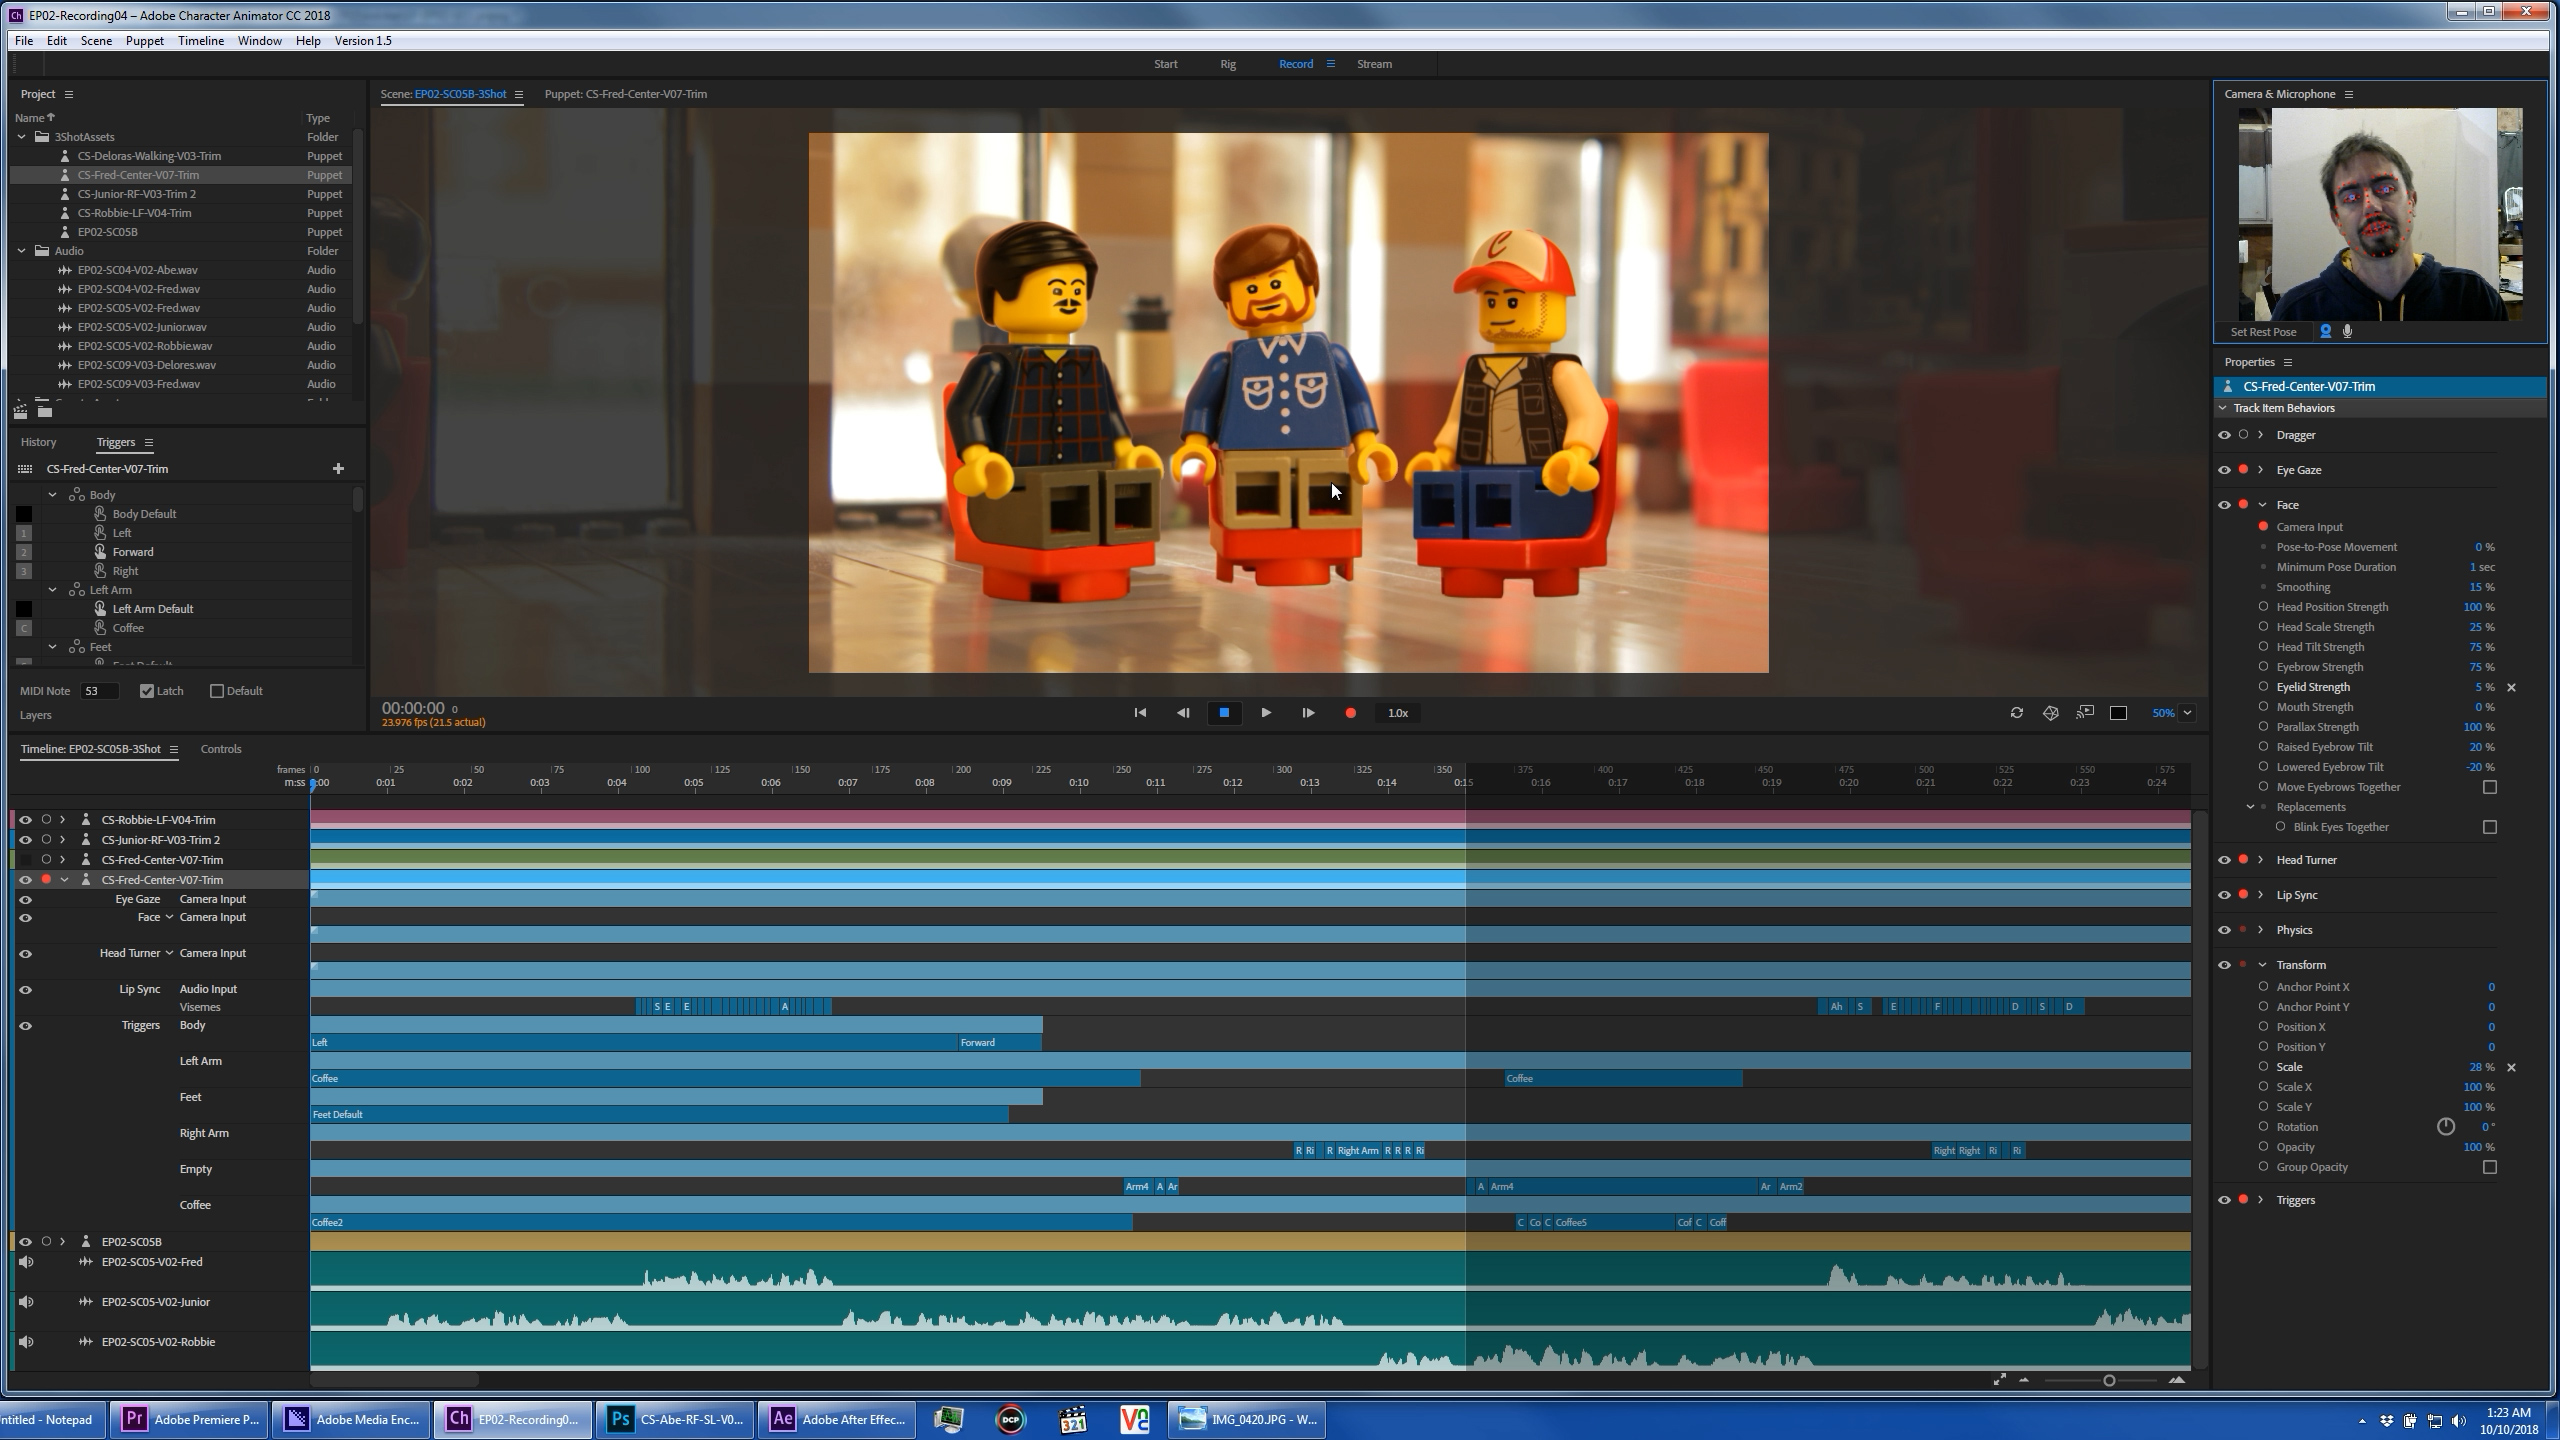 We computed lip sync for each puppet based on their dedicated dialog track, and usually exported immediately, to have a draft visual to continue editing the dialog with in Premiere Pro. Having a visual reference makes a big difference when trying to determine how a conversation will feel, so that was an important step, even though we had to throw away our previous work in Character Animator once we made significant edit changes that altered sync. We repeated the process once we had a more final edit, and then carried on from there in Character Animator, recording arm and leg motions with the MIDI keyboard in real time for each character. Once those trigger layers had been cleaned up and refined, we recorded the facial expressions, head positions, and eye gaze with a single pass on the webcam. Every re-record to alter a particular section adds a layer to the already complicated timeline, so we limited that as much as possible, usually re-recording instead of making quick fixes unless we were nearly finished.
 Compositing the Characters Together
Once we had fully animated scenes in Character Animator, we would turn off the background elements, and isolate each character layer to be exported in Media Encoder via dynamic link. I did a lot of testing before settling on JPEG2000 MXF as the format of choice. I wanted a highly compressed file, but need alpha channel support, and that was the best option available. Each of those renders became a character layer, which were composited into our stage layers in After Effects. We could have dynamically linked the characters directly into AE, but with that many layers, that would decrease performance for the interactive part of the compositing work. 
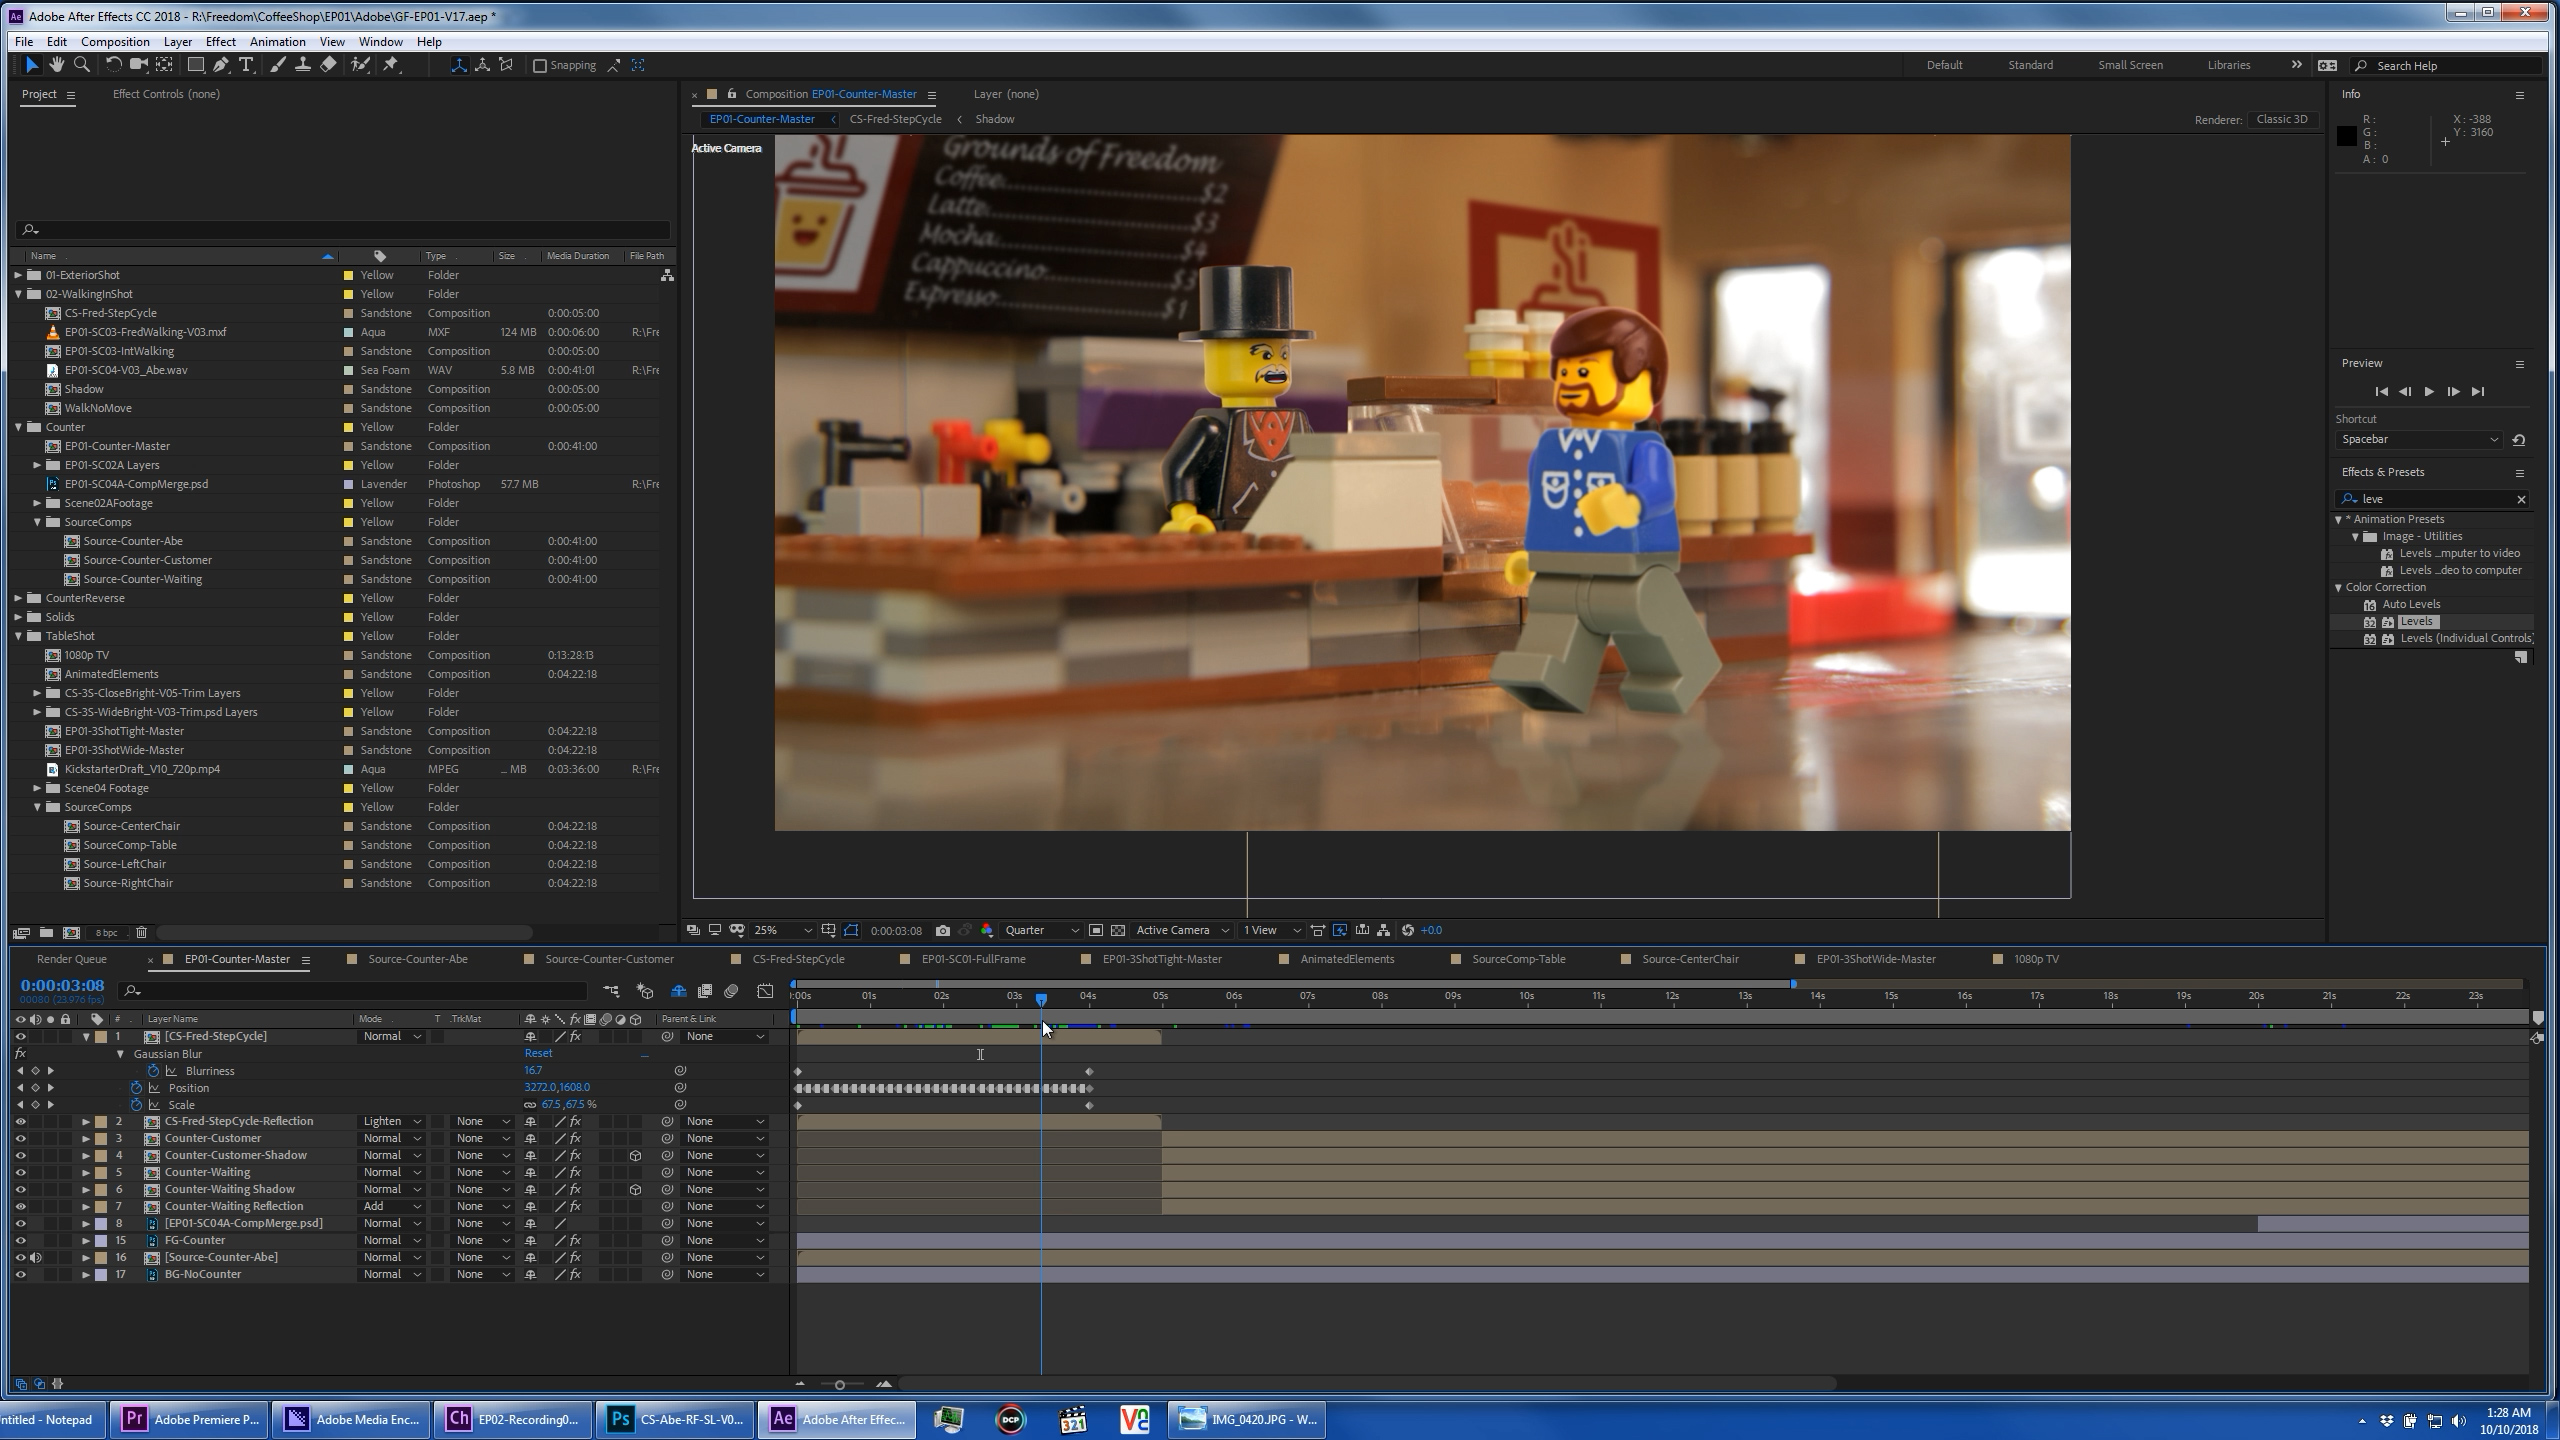
 We added shadows and reflections in AE, as well as various other effects. Walking was one of the most challenging effects to properly recreate digitally. Our layer cycling in Character Animator resulted in a static figure swinging their legs, but people (and mini-figures) have a bounce to their step, and move forward at an uneven rate as they take steps. So with some pixel measurement and analysis, I was able to use anchor point key-frames in After Effects to get a repeating movement cycle that made the character appear to be walking on a treadmill. I then used carefully calculated position key-frames to add the appropriate amount of travel per frame for the feet to stick to the ground, which varies based on the scale as the character moves toward the camera. (In my case the velocity was half the scale value in pixels per seconds.) We then duplicated that layer to create the reflection and shadow of the character as well. That result can then be composited onto various digital stages; in our case the first two shots of the intro were designed to use the same walk animation with different background images.
 All of the character layers were pre-comped, so we only need to update a single location when a new version of a character was rendered out of Media Encoder, or when we brought in a dynamically linked layer, and it would propagate all the necessary comp layers to generate updated reflections and shadows. Once the main compositing work was finished, we usually only needed to make slight changes in each scene between episodes. These scenes were composited at 5K, based on the resolution off the DSLR photos of the sets we had built. These 5K plates could be dynamically linked directly into Premiere Pro, and occasionally were later in the process to ripple slight changes through the workflow. But for the interactive work, we got far better editing performance by rendering out flattened files. We started with DNxHR 5K assets, but eventually switched to HEVC files since they were 30x smaller, and imperceptibly different in quality with our relatively static animated content.
 Editing the Animated Scenes
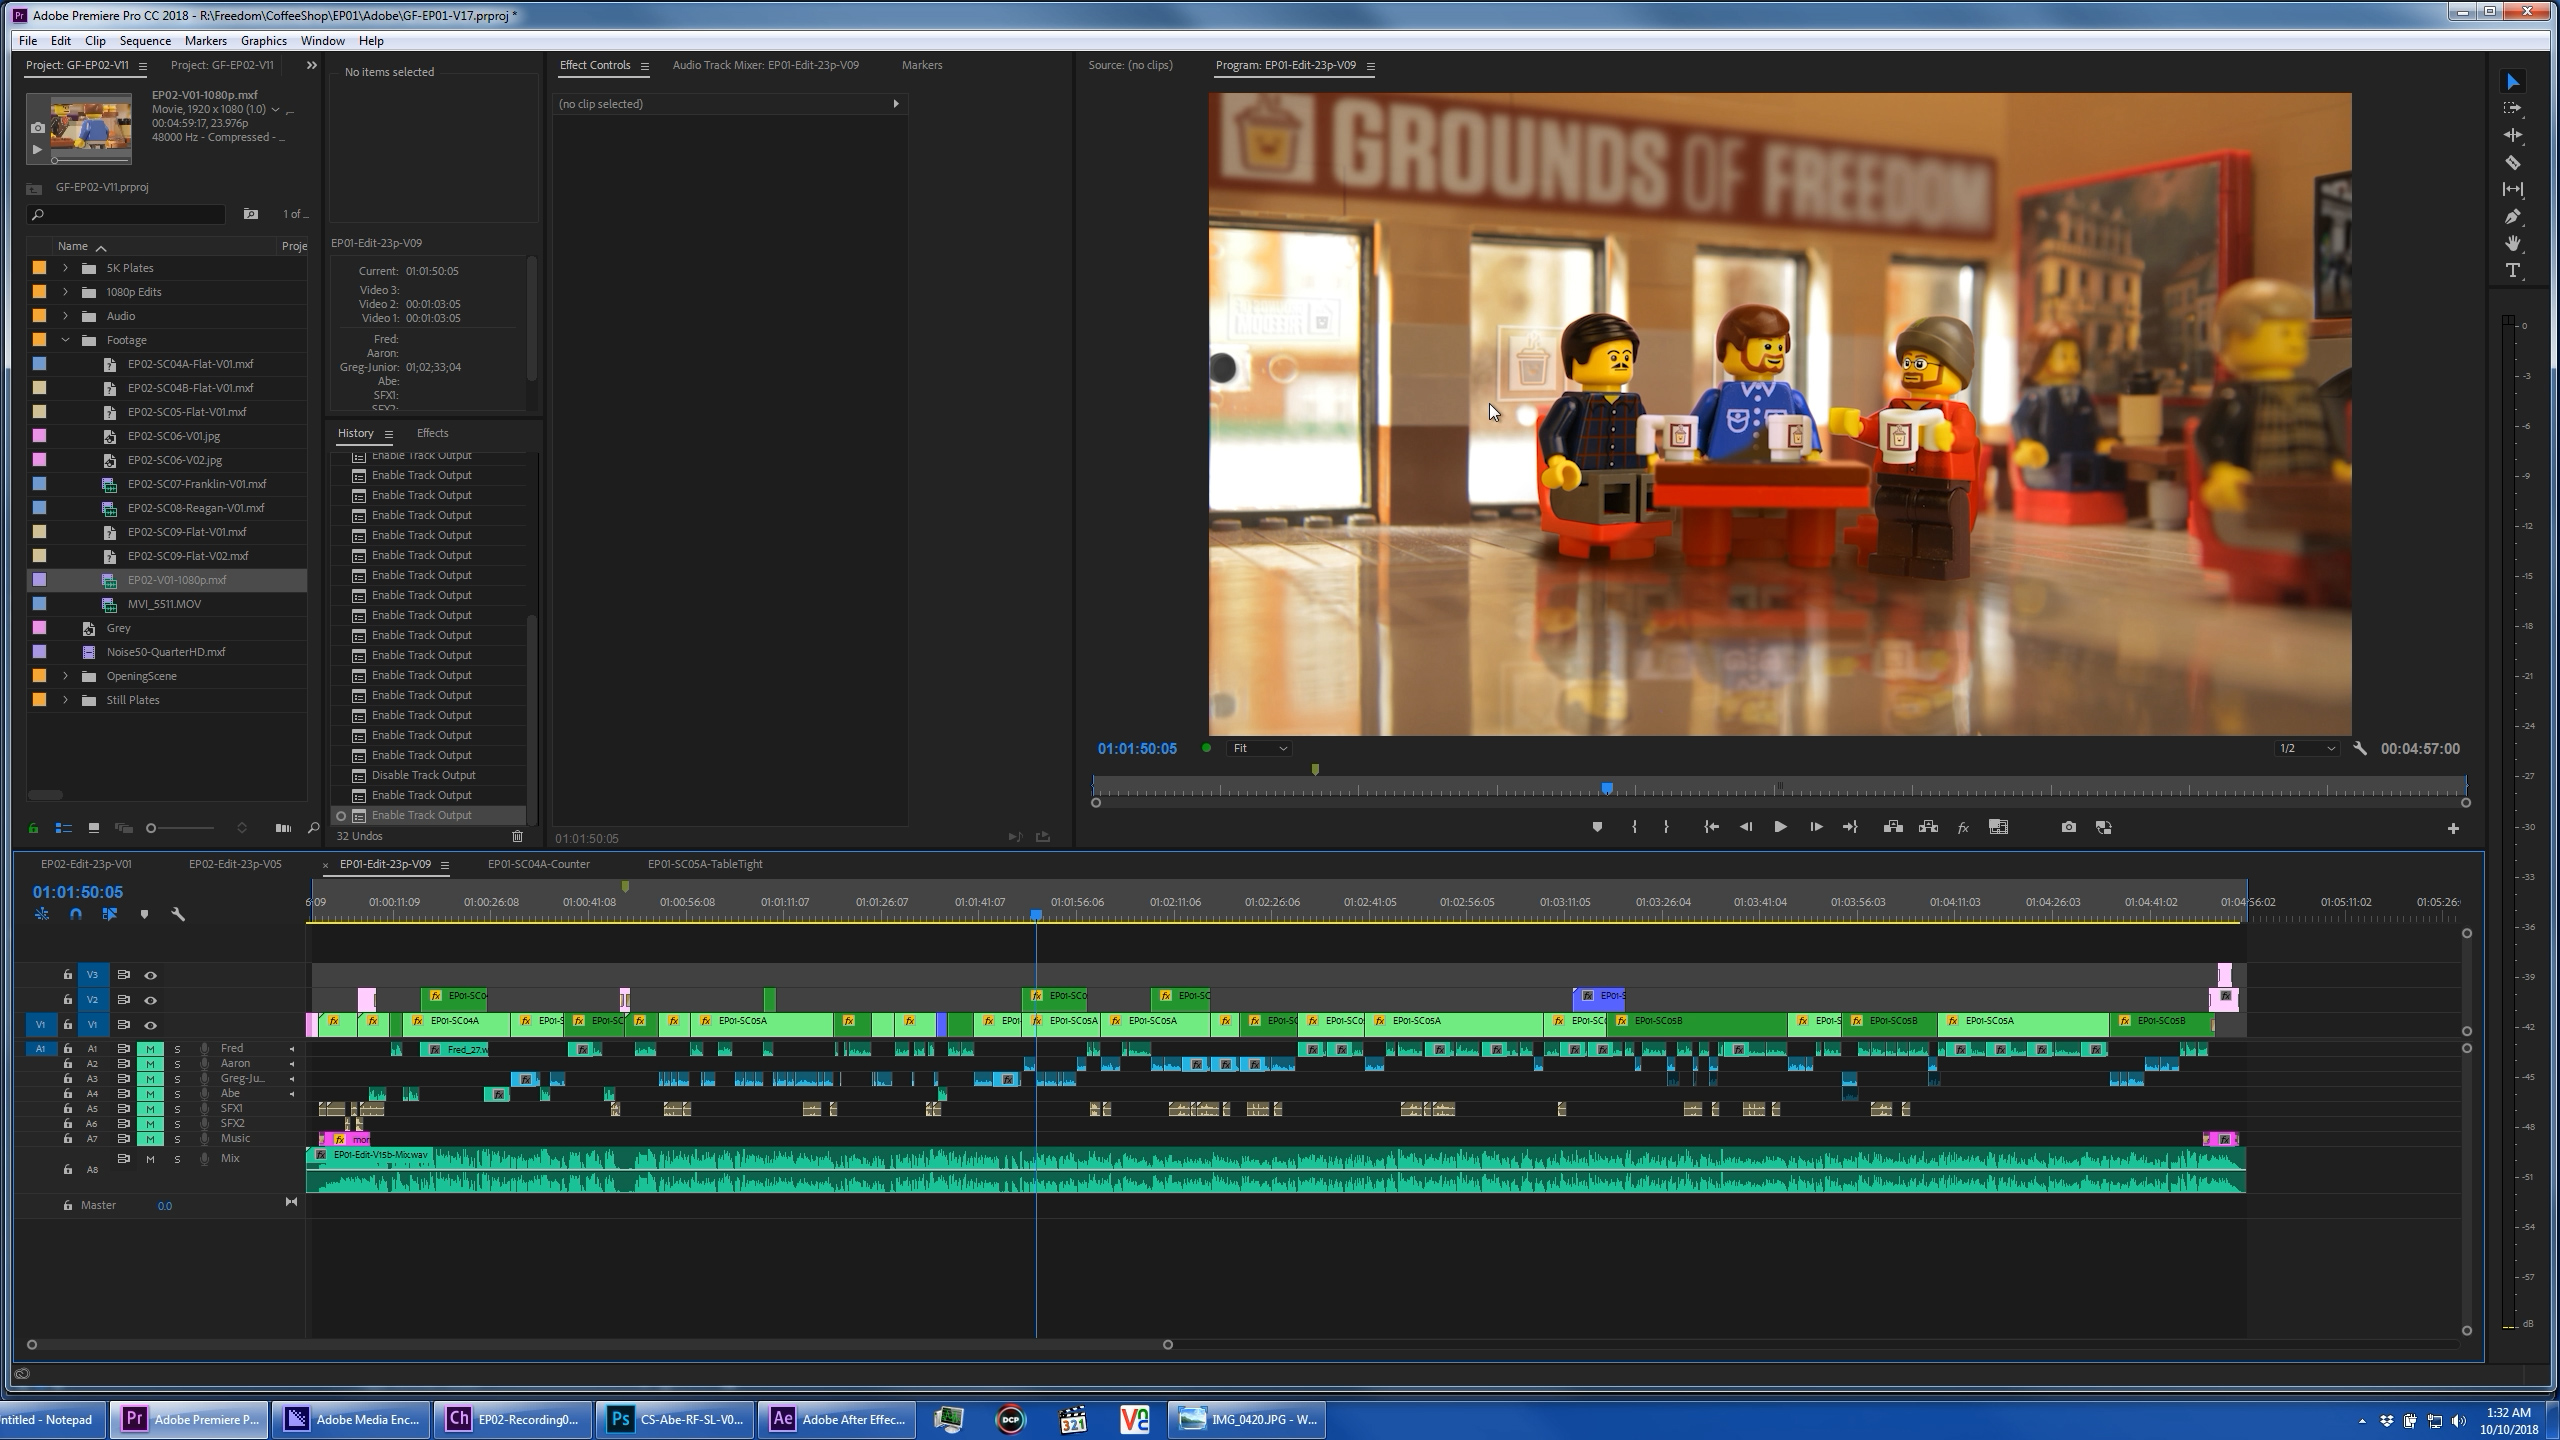
In Premiere Pro, we had the original audio edit, and usually a draft render of the characters with just their mouths moving. Once we had the plate renders, we placed them each in their own 5K scene sub-sequence, and used those sequences as source on our master timeline, allowing us to easily update the content when new renders were available, or source from dynamically linked layers instead if needed. Our master timeline was 1080p, so with 5K source content, we could push in two and a have times the frame size without losing resolution. This allowed us to digitally frame every shot, usually based on one of two rendered angles, and gave us lots of flexibility all the way to the end of the editing process.
 Collaborative Benefits of Dynamic Link
While dynamic link doesn’t offer the best playback performance without making temp renders, it does have two major benefits in this workflow. It ripples change to the source PSD all the way to the final edit in Premiere just by bringing each app into focus once. (I added a name-tag to one character’s PSD during my presentation, and ten seconds later, it was visible throughout my final edit.) Even more importantly, it allows us to collaborate online without having to share any exported video assets. As long as each member of the team has the source PSD artwork, and audio files, all we have to exchange online are the Ch project (Which is small once the temp files are removed), the .AEP file, and the .PrProj file. This gives any of us the option to render full quality visual assets anytime we need them, but the work we do on those assets is all contained within the project files that we sync to each other. The coffee shop was built and shot in Idaho, our voice recorder was in Florida, our puppets faces are created in LA, I animate and edit in NorCal, the AE compositing was done in LA, and the audio is mixed in New Jersey. And we did all that with nothing but a Dropbox account, using this workflow.
Past that point it was a fairly traditional finish, in that we edited in music and sound effects, and sent an OMF to Steve, our sound guy at DAWPRO Studios for the final mix. During that time we added any other B-Role visuals or other effects, and once we had the final audio back, we rendered the final result to H.264 at 1080p, and uploaded to Youtube.